
Secondary survey
A Practical Secondary Survey: Head-to-Toe Assessment in Pre-Hospital Care
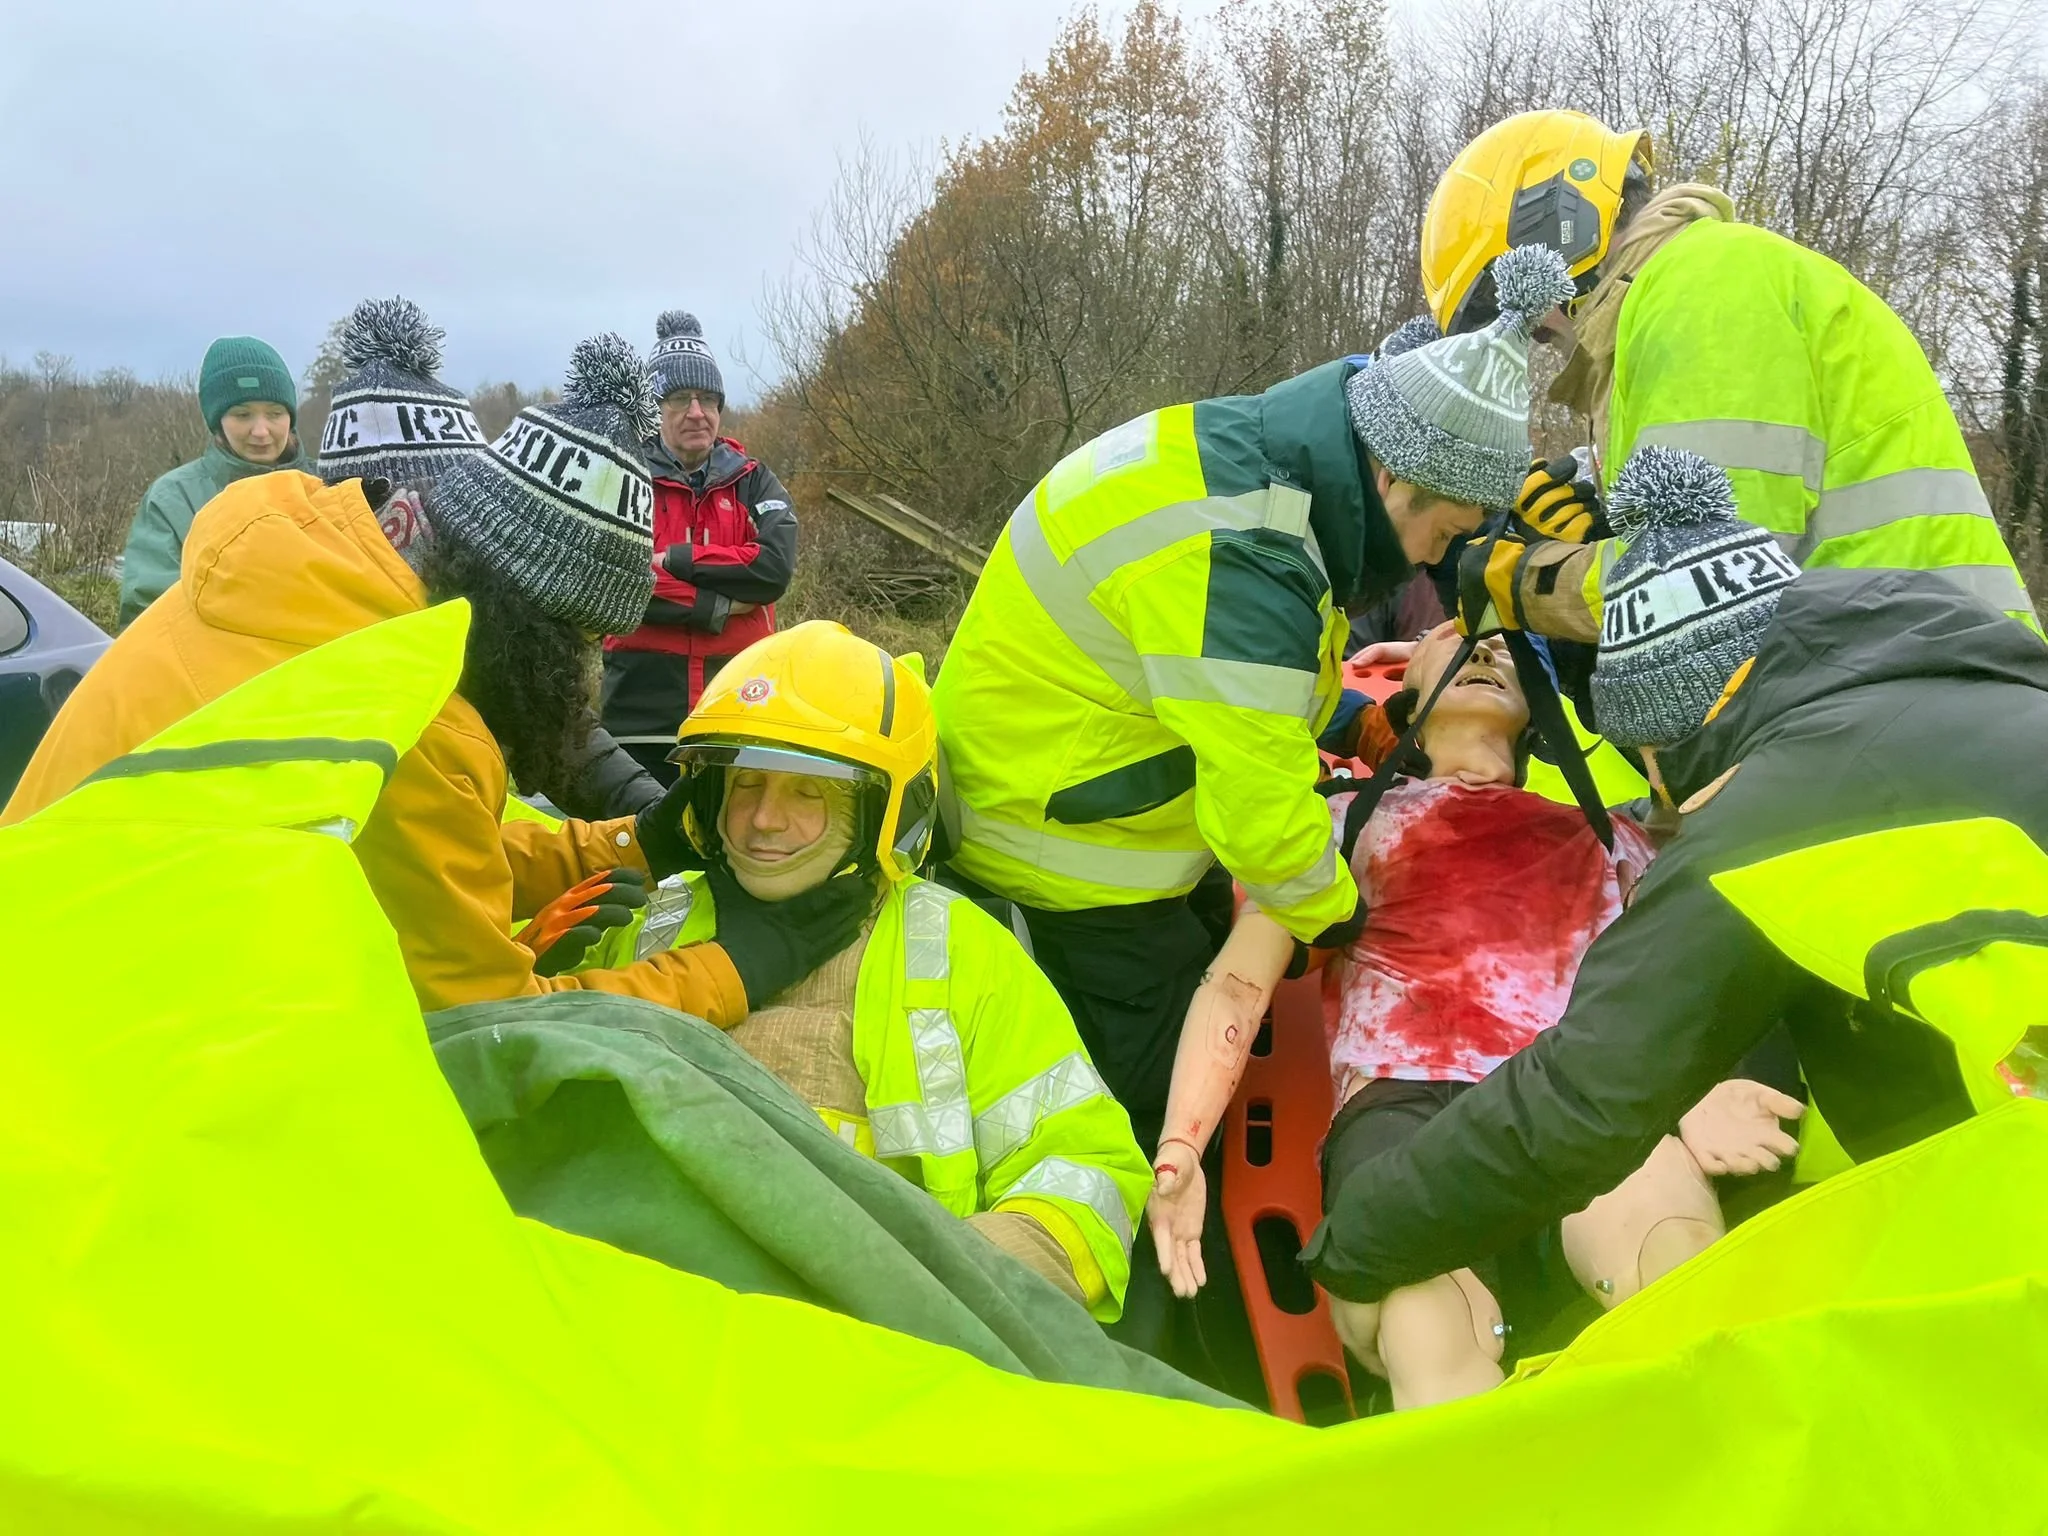
The secondary survey is a structured, methodical head-to-toe examination performed once the primary survey (DRCABCDE) has been completed and immediate life-threats have been addressed. Its purpose is to identify additional injuries, subtle signs of serious pathology, and evolving clinical problems that may influence triage, treatment, and transport decisions.
If the patient is unconscious, has an unknown history, or there is suspicion of spinal trauma, spinal motion restriction should be maintained throughout, including during any log-roll.
General principles before you start
Maintain manual cervical spine control where indicated.
Use a systematic, repeatable sequence.
If your gloved hands disappear, they get checked for blood.
No gloves, no love.
Any deterioration → return immediately to the primary survey.
1. Head and scalp
Begin at the vertex of the skull, using both hands.
Palpation
Assess for scalp lacerations, swelling, and bleeding
Feel for bogginess (suggestive of underlying skull fracture or haematoma)
Check skull stability and step deformities
Signs of basal skull fracture
Post-auricular ecchymosis (Battle’s sign) – bruising behind the ears
Periorbital haematoma (raccoon eyes)
Otorrhoea – fluid leaking from the ears
Rhinorrhoea – fluid leaking from the nose
Cerebrospinal fluid (CSF) leakage, either alone or mixed with blood, is concerning. Blood alone is less specific.
Where time allows:
Halo sign (gauze test) – CSF separates from blood forming a clear ring
Glucose testing may help differentiate CSF from blood
In reality, these are often impractical pre-hospital; clinical suspicion matters more.
2. Eyes and face
Eyes
Assess PERRLA
Pupils Equal, Round, Reactive to Light and Accommodation
Look for:
Unequal pupils (anisocoria)
Non-reactive pupils
Periorbital bruising or swelling
Face and jaw
Inspect and palpate for:
Facial fractures
Instability (?Le Forte Fracture)
Dental injury
Check dentition and note loose or missing teeth - Plan A is to replace teeth back in socket if possible, Plan B is to place the tooth between the gums and cheeks (in conscious patients only), Plan C is to place in milk
Always consider airway implications again during secondary survey
3. Neck
While maintaining spinal precautions:
Inspect for bruising, swelling, wounds, or deformity
Palpate gently for:
Midline cervical tenderness
Step deformities
Assess for:
Tracheal deviation
Surgical emphysema
Any abnormality should heighten suspicion of cervical spine injury.
4. Shoulders and upper limbs
Spring the shoulders gently to assess clavicles and shoulder girdle.
Inspect and palpate:
Clavicles
Upper arms
Elbows
Forearms
Wrists and hands
Assess long bones for:
Deformity
Pain
Swelling
Check circulation, sensation, and movement (CSM) bilaterally
5. Chest and thorax
FLAPS TWELV is a good mnemonic to remember the following steps:
FEEL & LOOK: Using both hands together in a praying position, move down the sternum then once at the bottom of the sternum, fan outward with flattened hands to assess the entire thorax circumference, then move up to assess the axillae (armpits), then assess the back as much as possible without rolling using a large ‘X’ formation with your arms and hands. Do this to check for:
Tracheal deviation
Wounds (don't forget the neck and axillae! Tip: if its a bleeding junction - pack it, if its not - chest seal)
Surgical emphysema
Larygenal crepitus
Venous distention (of the jugular veins either side of the neck)
Evaluate all your signs and symptoms you have found so far and decide if needle thoracocentesis is required (reduced GCS paired with any of the above in major trauma)
Auscaltate: if available, use your stethoscope to auscaltate for:
Equal bilateral rise and fall of the chest
Equal bilateral air entry and exit
Reduced air entry and exit (potential for haemothroax - blood in the chest cavity, or pneumothorax - air in the chest cavity
Bowel sounds - a sign of diaphragmatic rupture.
Percuss: This step often isn’t possible due to ambience noise, but if possible assess for the following:
Hypo-resonance: if combined with reduced air entry over the same area, suspect haemothorax and prepare fot finger or tube thoracostomy if trained and authorised to do so
Hyper-resonance: if combined with reduced air entry over the same area, suspect pneumothorax and prepare for needle thoracocentesis (vhest decompression) if trained and authorised to do so.
Search: Search those junctional areas, the upper back and armpits again - these are high risk areas for wounds and injuries that are often missed!
6. Abdomen
Inspect for:
Bruising (including seatbelt sign)
Distension
Penetrating injury
Undertake Manual Inline Stabilisation if the pentrsting injury has crossed the Midline i.e. it may have struck the spine
Palpate gently for:
Tenderness
Guarding
Rigidity
Remember, abdominal injury may be occult and deteriorate over time.
7. Pelvis
Inspect first:
Leg position (splayed or externally rotated)
Asymmetry
Do NOT spring the pelvis
While assessing this area, look for indirect signs of other injuries:
Scrotal swelling (abdominal haemorrhage)
Perineal bruising (abdominal haemorrhage)
Priapism (suggestive of spinal cord injury)
8. Lower limbs
Inspect and palpate:
Femurs: if fracture is suspected apply traction to effected limb if trained to do so
Knees
Lower legs: if open fracture, consider prophylactic broad spectrum anti biotics if trained and authorised to do so
Ankles and feet: Ottawa ankle and mid foot rules are good tools to assist with imaging decision making. Babinki's response should also be tested at this stage with a negative test being good (toes plantarflex), a positive test being bad (toes dorsiflex) and no response likely meaning the casualty has had this since birth.
Check CSM in both legs
9. Posterior examination (log-roll if indicated)
Only if:
Adequate personnel are available
Spinal precautions are maintained
Assess:
Entire back
Spine alignment
Wounds, bruising, bleeding
Buttocks and posterior thighs
Again: if your gloved hands disappear, check them for blood.
10. Reassessment and documentation
The secondary survey:
Is not a one-off
Must be repeated
Should inform:
Ongoing treatment
Triage priority
Transport destination
Clinical handover
Any deterioration → return to DRCABCDE immediately.
Key takeaway
The secondary survey is a deliberate, methodical head-to-toe assessment that complements the primary survey. When performed properly, it reduces missed injuries, improves triage decisions, and strengthens patient safety in pre-hospital care.
Disclaimer: This guide is provided for educational purposes only. It is not a substitute for certified first aid training. Although we base our information on current UK-approved guidelines (Resuscitation Council UK, St John Ambulance, etc.), performing first aid requires practice, training and judgement. If in doubt, always call emergency services (999 in the UK) and wait for professional responders. K2 International does not accept liability for actions taken by users based on this guide.